

Today we are discussing about the excel collaboration with CRM, we know that Excel has a lot of capabilities to manipulate, calculate and filter the data. Here, I am going to explain how to implement all these things with CRM.
In its initial release, CRM has Export to excel feature. In the latest version Microsoft Dynamics CRM has provided some of the predefined templates or we can say that, you can create your own template. This template gives you the base structure of your record, using such template you can quickly understand and analyze your data. In CRM 2015 and 2016 versions allows users to import and export sheet in excel format and it allows user to work with data from the downloaded template or Excel online.
This feature is also available for CRM mobile application, you can import and export Excel directly from your device i e, mobile & tablet.
In the latest version of CRM you can create 2 types of templates Excel and word
If you have records in CRM and you want to use the same at some other place. This is one of the best method to transfer the data using Excel.
More Read

First, I would like to show you how to export your CRM data in Excel Format.
Follow the below steps for more understanding-
1) Here in my CRM, I have a Account entity and I need to export my active account to different organization, For such requirements, We need to create a query. In this query, we need to find out my active accounts.
Follow the below steps-
Login into CRM with your credential, click on Advanced find button for creating query.
Login into CRM with your credential, click on Advanced find button for creating query.
When you click on the “advanced find button” a popup is displayed here, you need to create your query for your account.
Refer the below image-
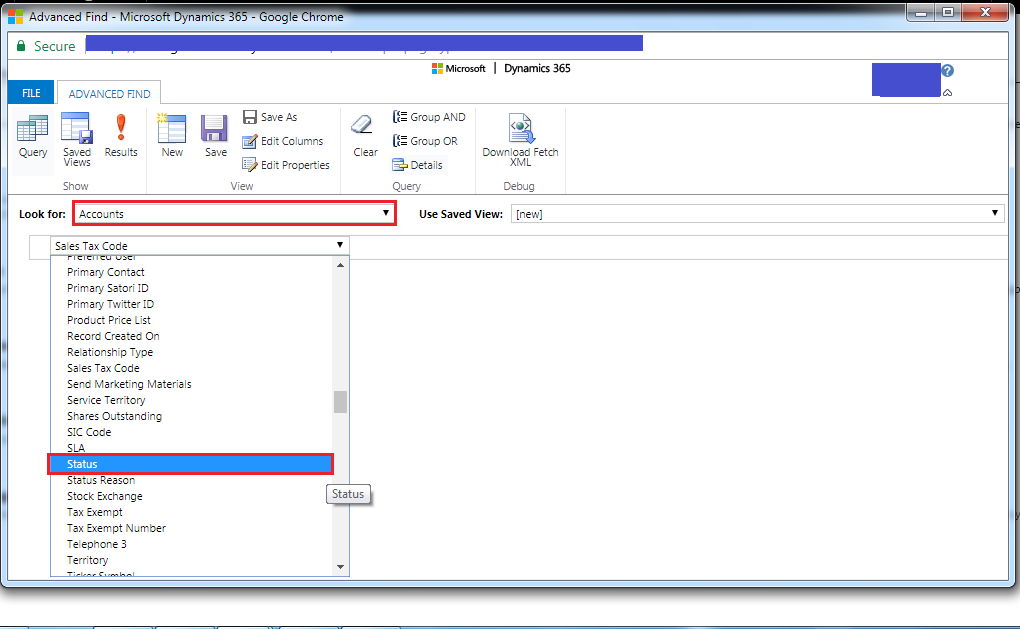
According to this image, we need to select entity name “Account” from Look for field and in lower dropdown we need to select field Status which is equal to “Active”.-
Refer the below image
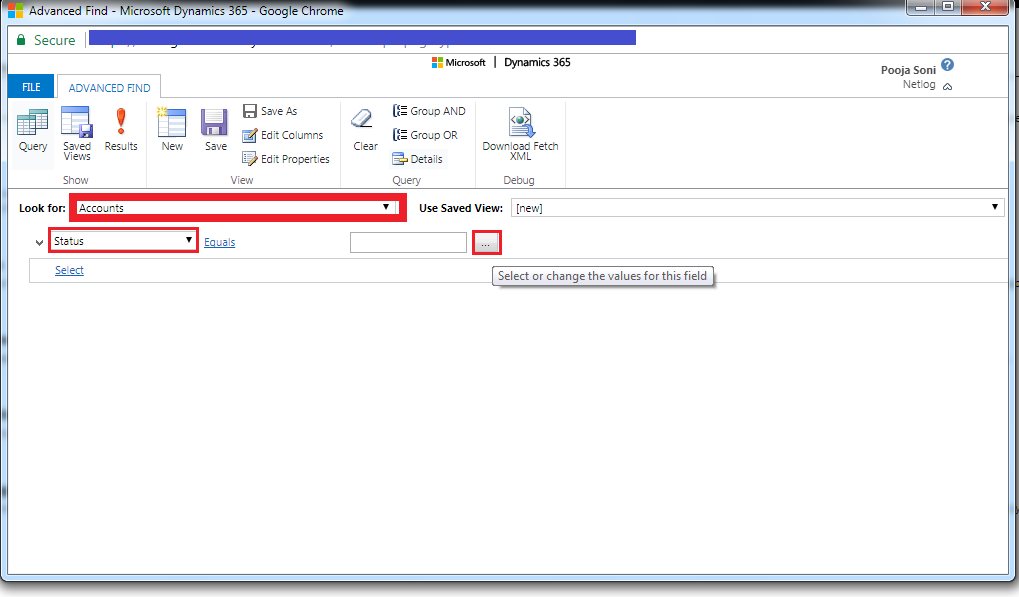
2) After this, We need to click on “…” button label which shows the type of status of Account entity
Refer the below image-
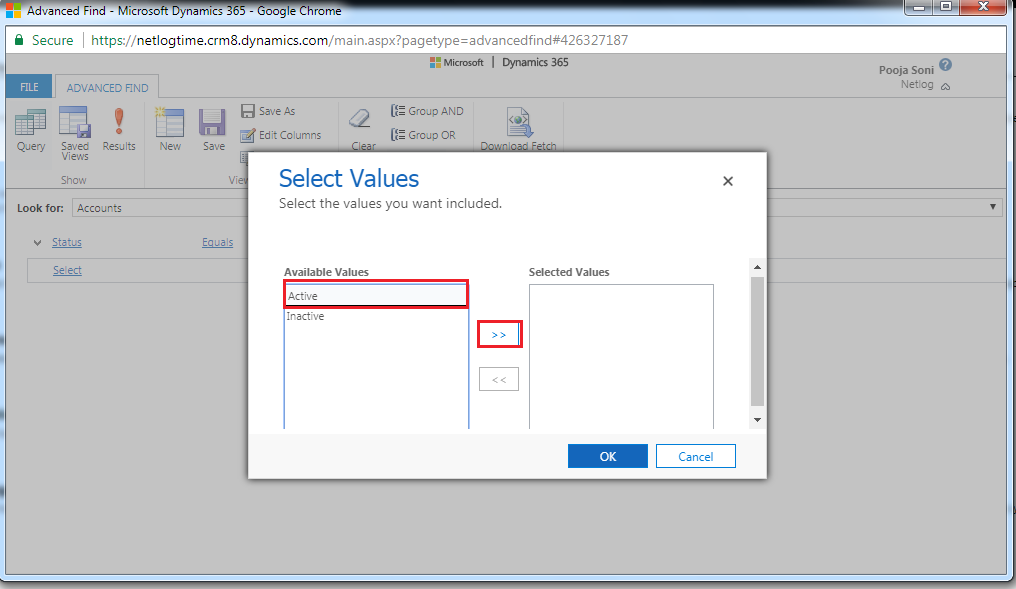
When you click on “…” button, a popup will appear. We need to select status as Active and click on “>>” button.
Refer the below image-
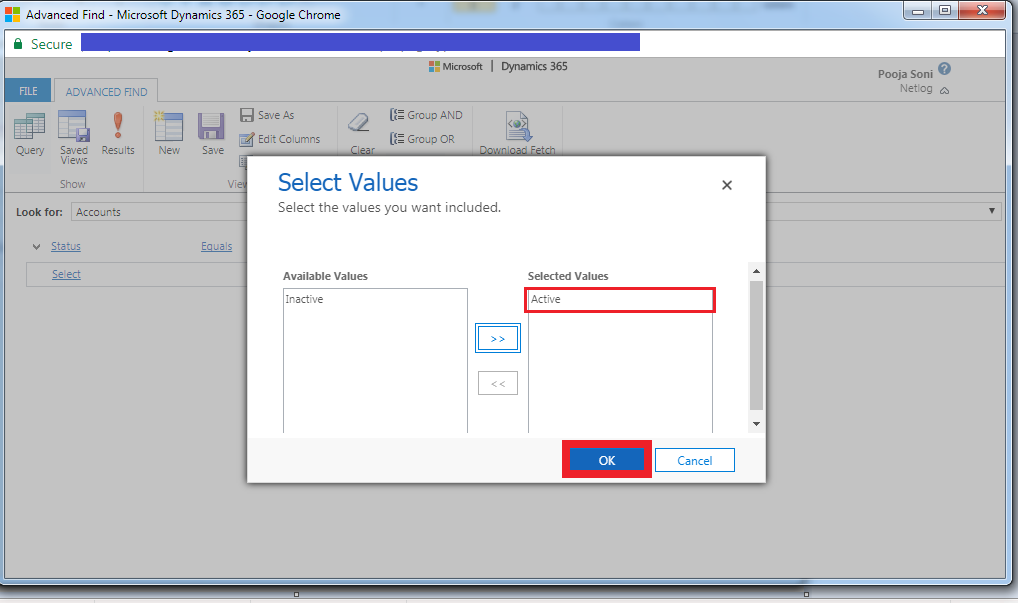
Click on “Ok” button. Now your query will look like this-
Refer the below image-
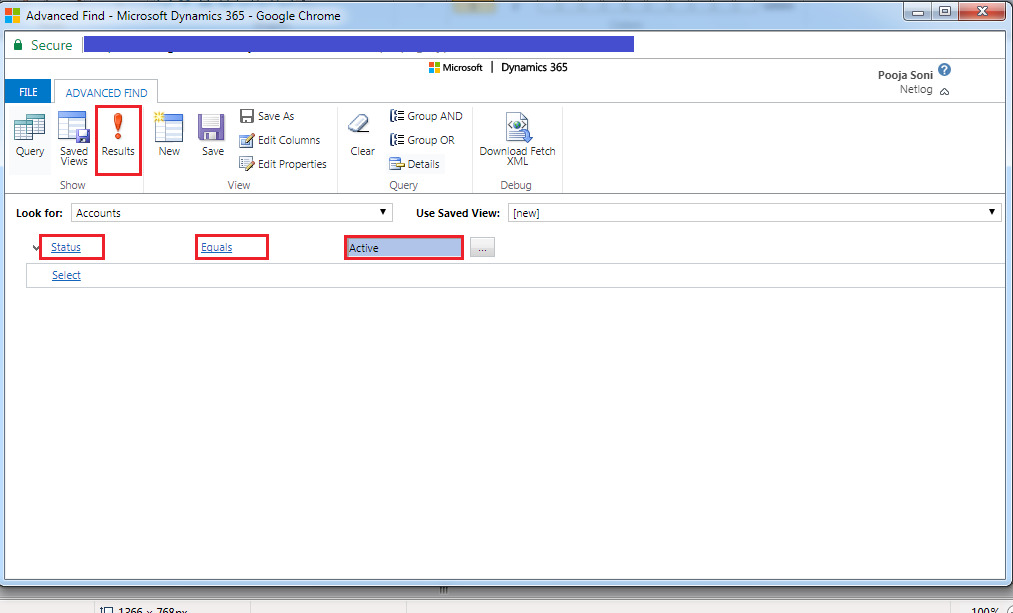
After this,we need to run this query using Run “!” button which, I have highlighted this in the previous image.
When you run this query the output will look like this-
Refer the below image-
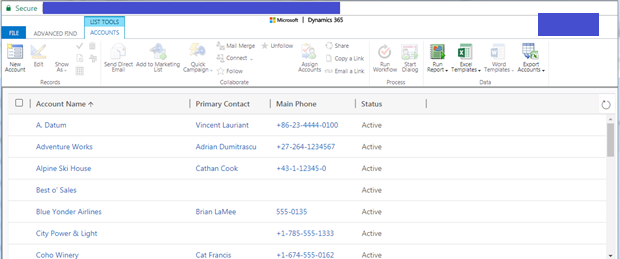
Now, you have 26 Record which has status Active.
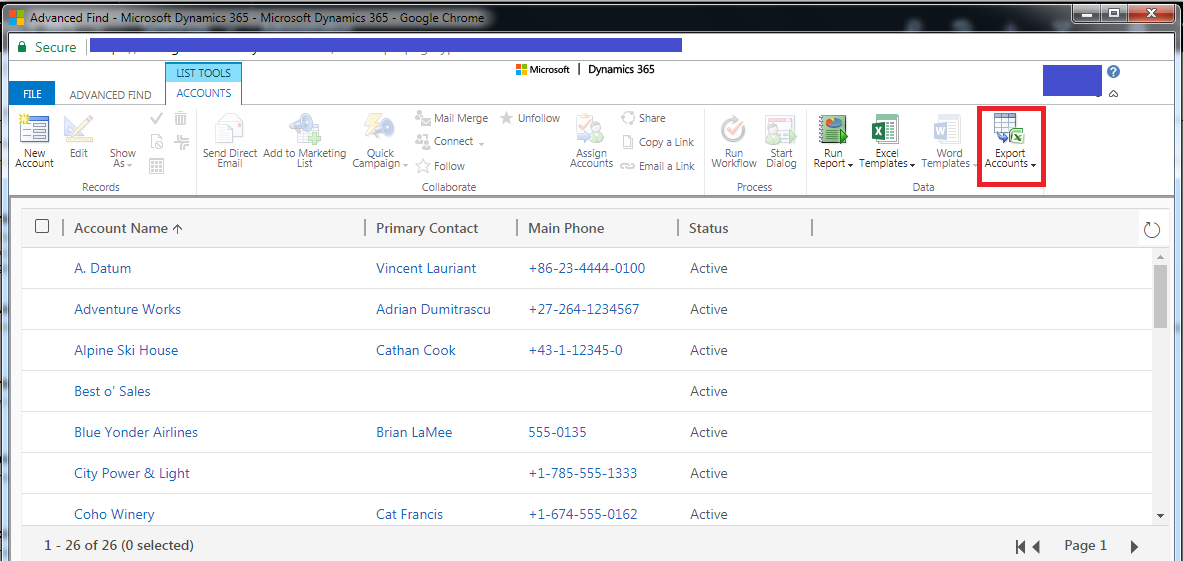
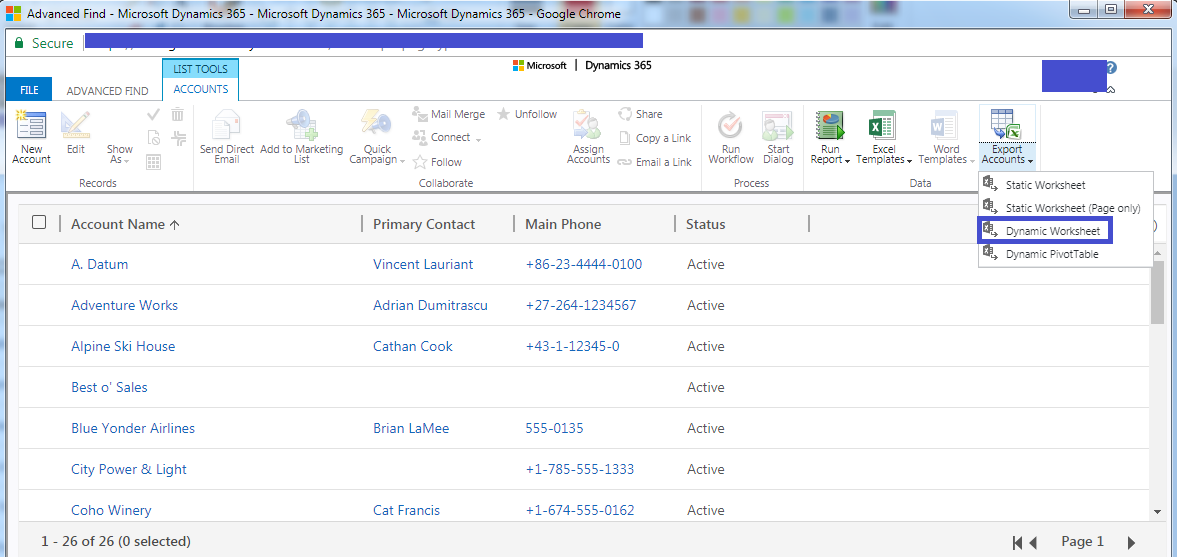
3) After executing this query, we need to export this record in Excel format.
Refer the below image-
For exporting records, click on highlighted “Export Account” Button.
And export your records result as a dynamic worksheet.
See the below image-
When you click on this option, a popup will appear.
See the below image-
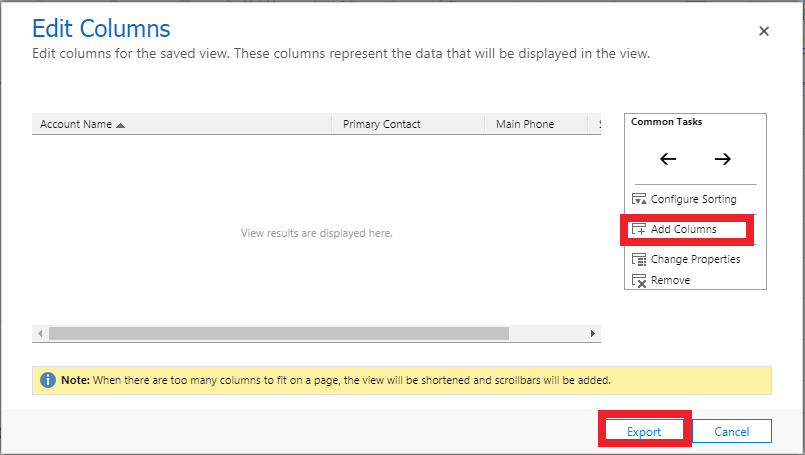
Here, if you wish you can add columns according to your requirement. Then, click on Export button.
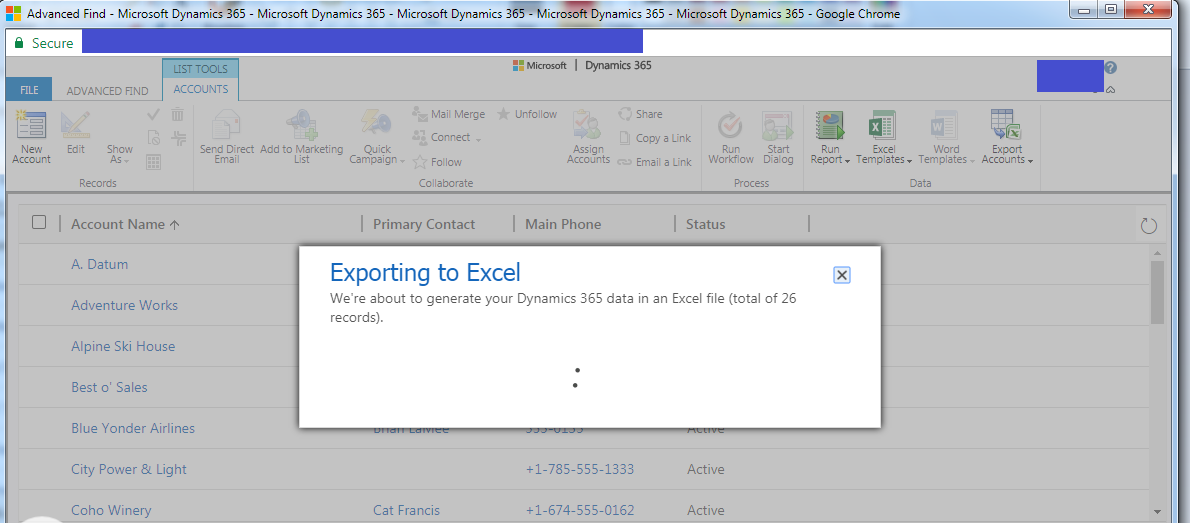
Records will export to your system location.
See the below image-
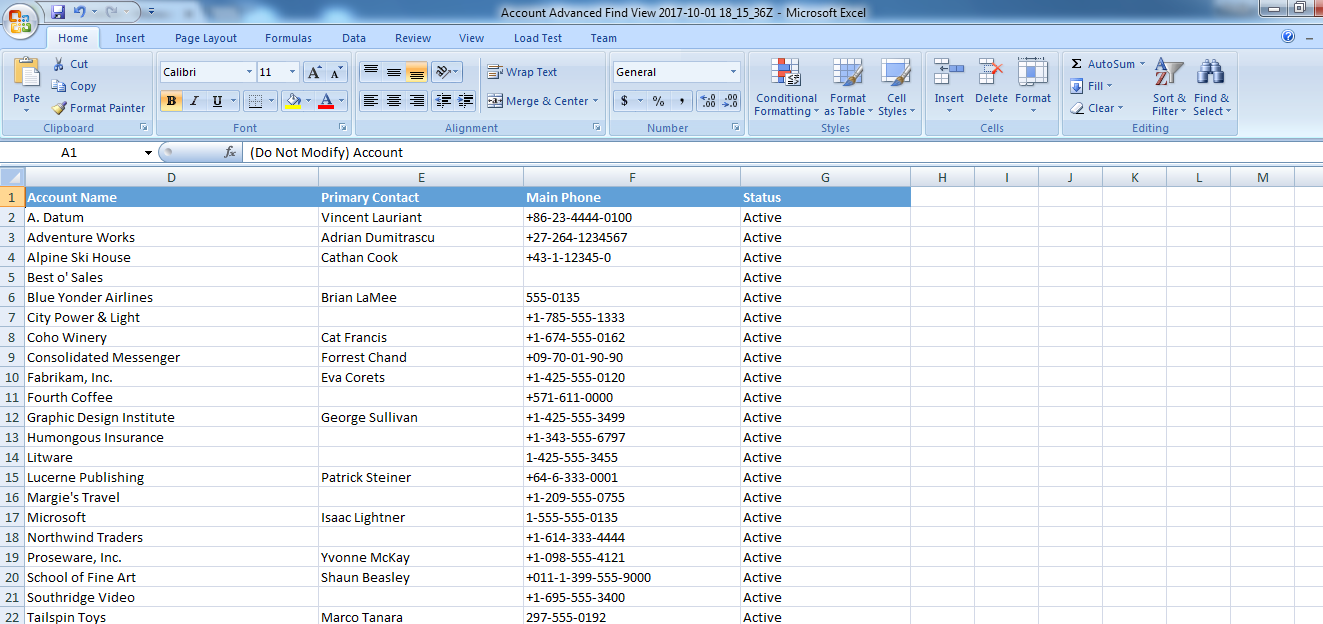
4) After these steps, we have account data which has status active .
See the below image after export your account records is look like this-
If you want, you can create new records using this sheet.
Refer the below image for creating new records-

In this sheet, I am creating an account record namely Ridaana, after creating record, you need to save and close the sheet. Then import this sheet in CRM.
For importing data in CRM, you need to follow these steps-
Go to setting Data Management
Refer the below image-
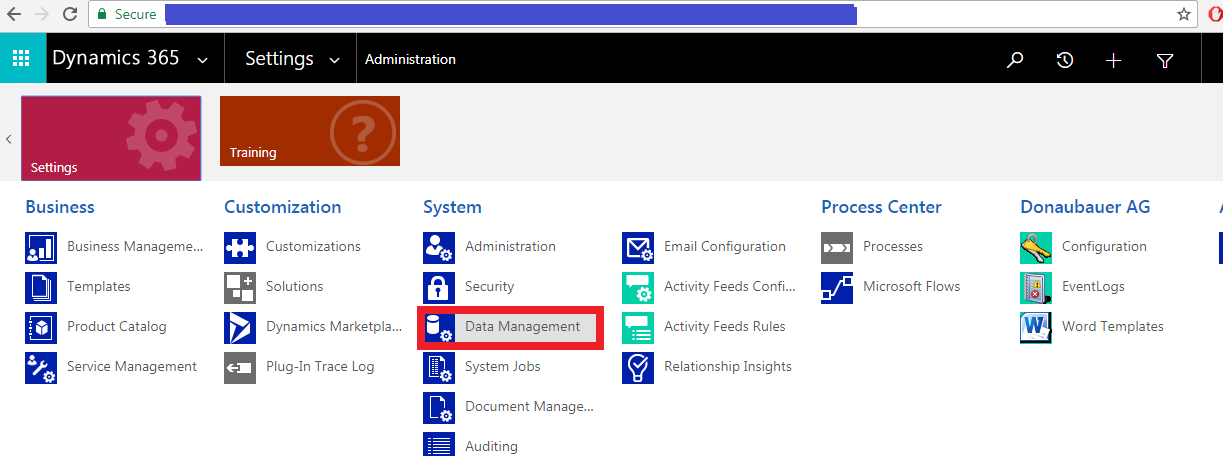
When you click on Data Management, a new window with list of icon is displayed, here you need to select “Imports” icon
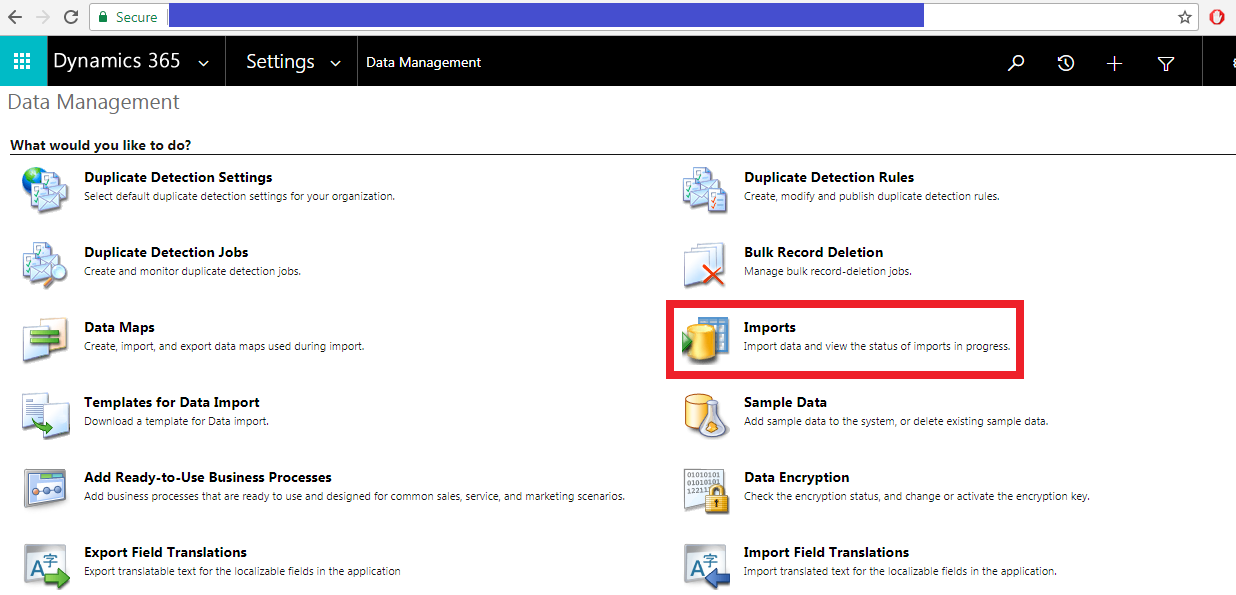
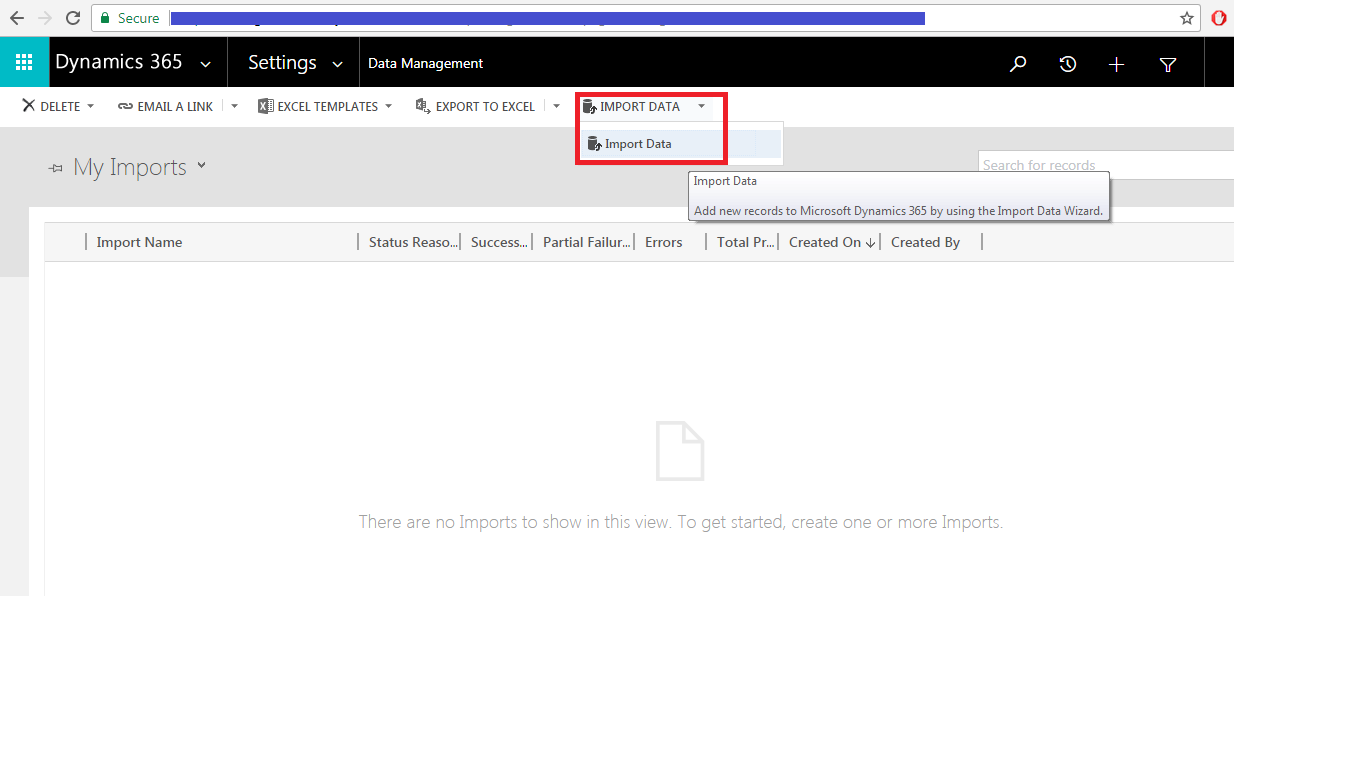
When you click import, a new window will open, Here you need to click on Import button from the ribbon-
In this window, you need to click on “IMPORT DATA” button for importing sheet.
Then, another popup is displayed here. You need to select the file which you want to import in CRM.
Refer the below image-
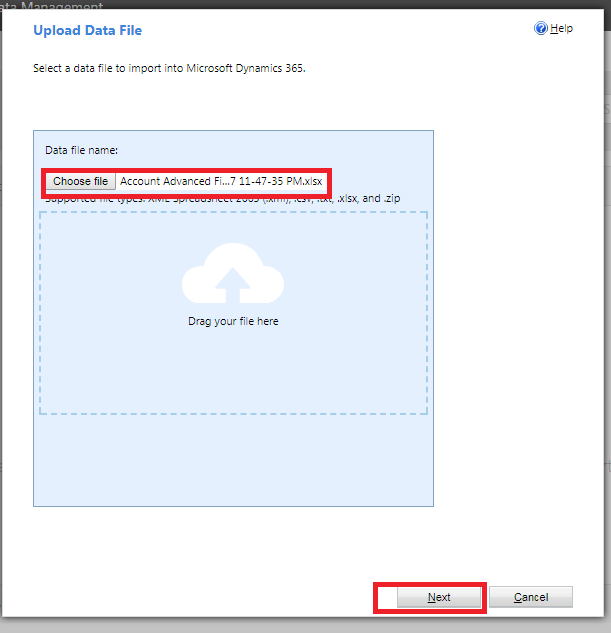
Then, click on next button. Another window will appear. Here, if you want you can allow duplicates. By default, No option is selected.
Refer the below image-
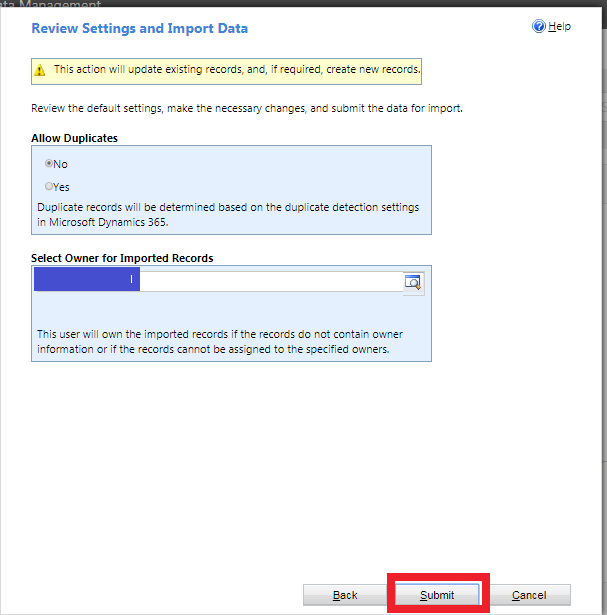
Click on the submit button.
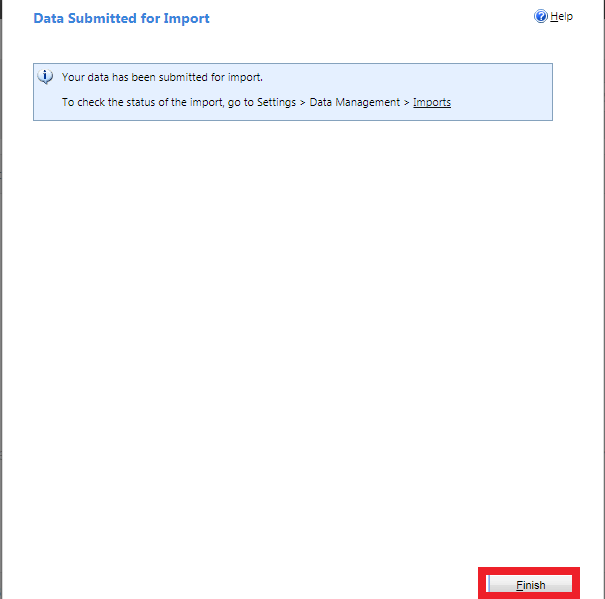
Now the data import is finished.
You can check your import data status in System job-
Refer the below image for this-
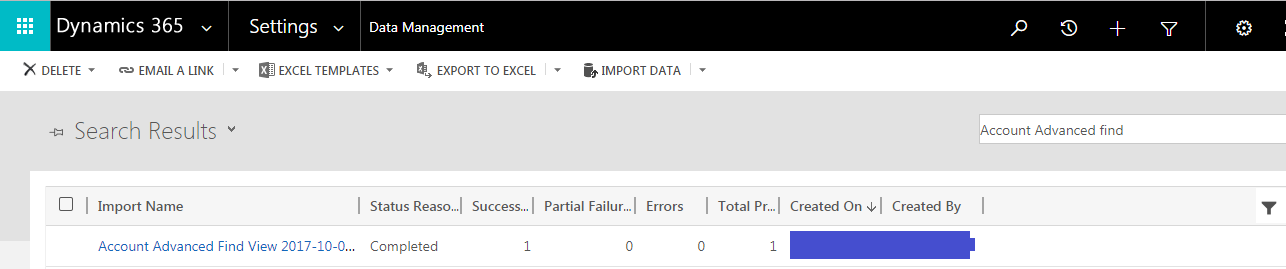
This image shows that, we had imported a record in CRM account entity.
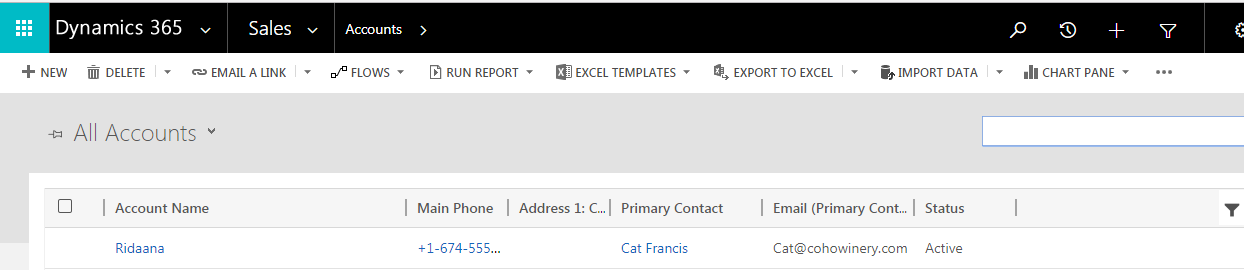
Let see the Account entity view-
5) This method was used earlier, but now in CRM, new enhancements have been done. We have Excel online feature which we can use easily,
Here, I am going to show, How to use Excel online feature?
Using this feature we are going to add a record in CRM.
For this, we need to go the account entity view where all the accounts are displayed.
From the ribbon we need to click “Export To Excel” button. When you select this button more than one option are being displayed. For our requirement, we need to choose “Open in Excel online” option.
Refer the below image-

When you select Open in Excel online your window will look like this :-
Refer the below image-
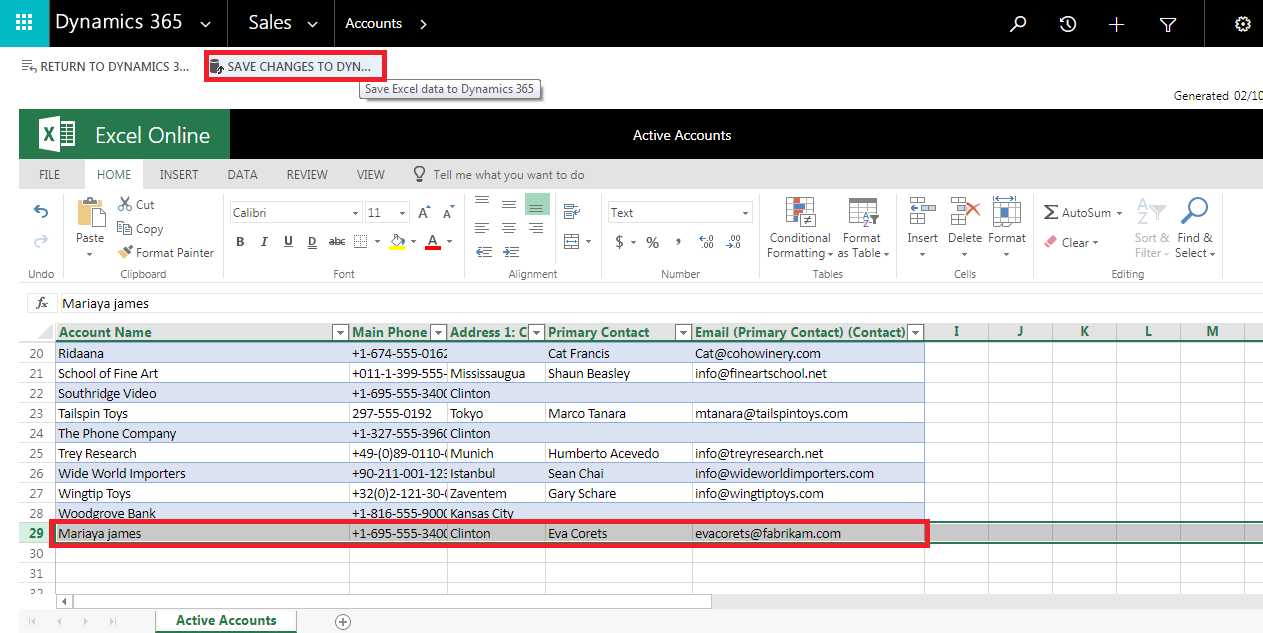
Here, you can create new record or update existing record. In the previous image, I had created a new record “Mariya”.
When your record creation is completed, click on “Save changes to Dynamics” Button.
When you click on this button a popup is displayed.
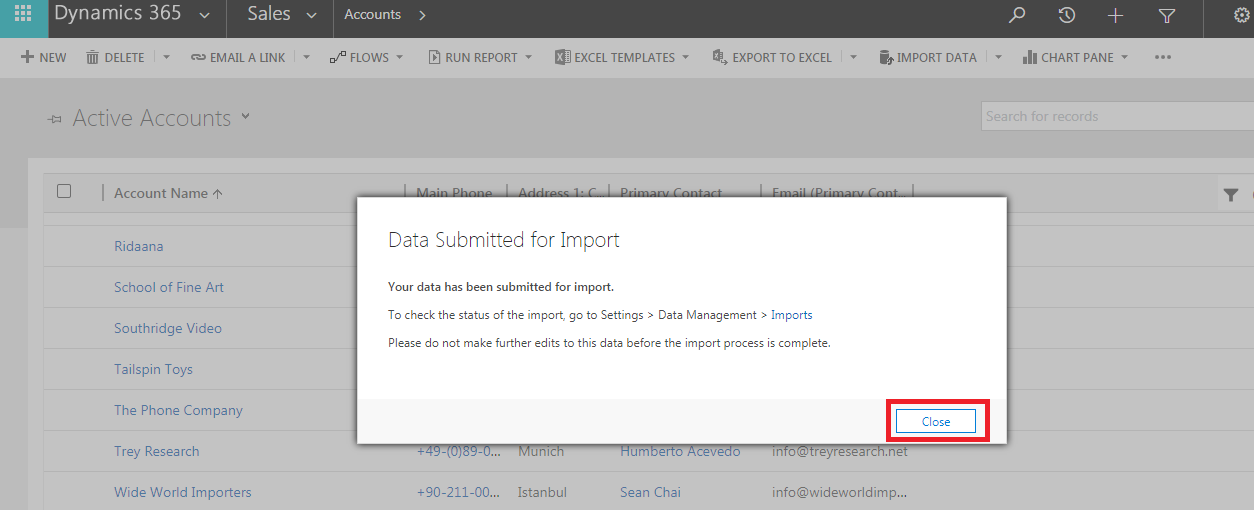
click on “close” button after that
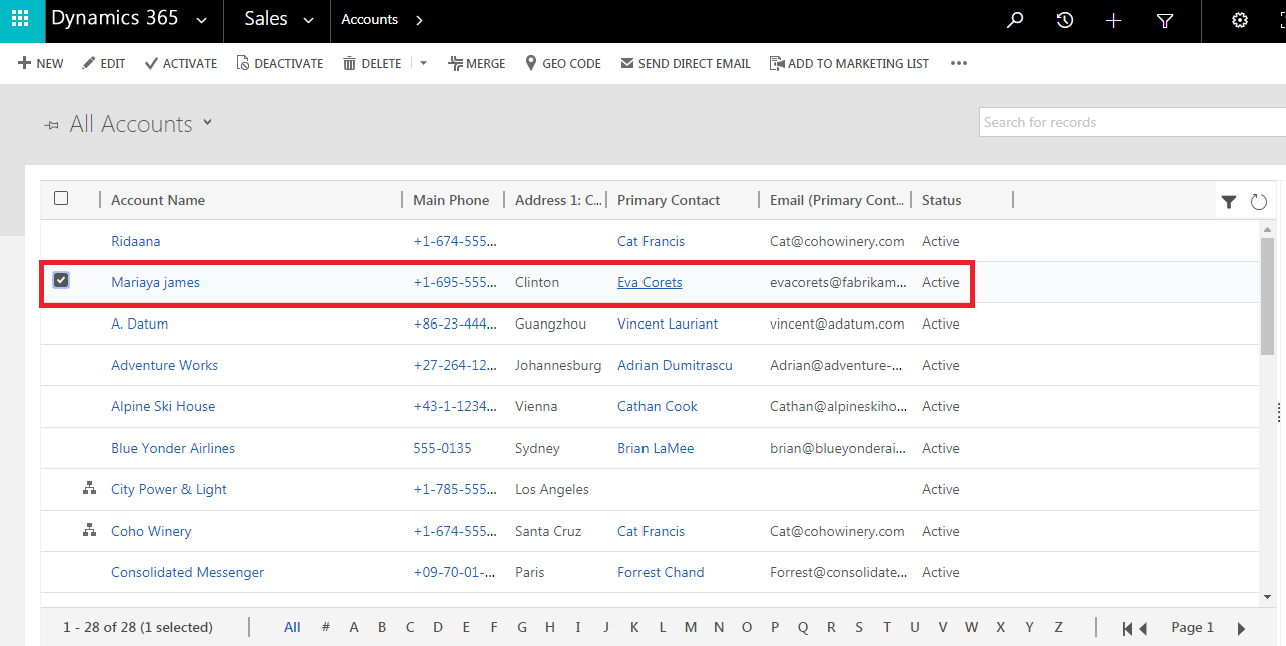
It will appear in normal view-
See the below image-
See the below image-
Now we have created two records for account entity using two different methods.
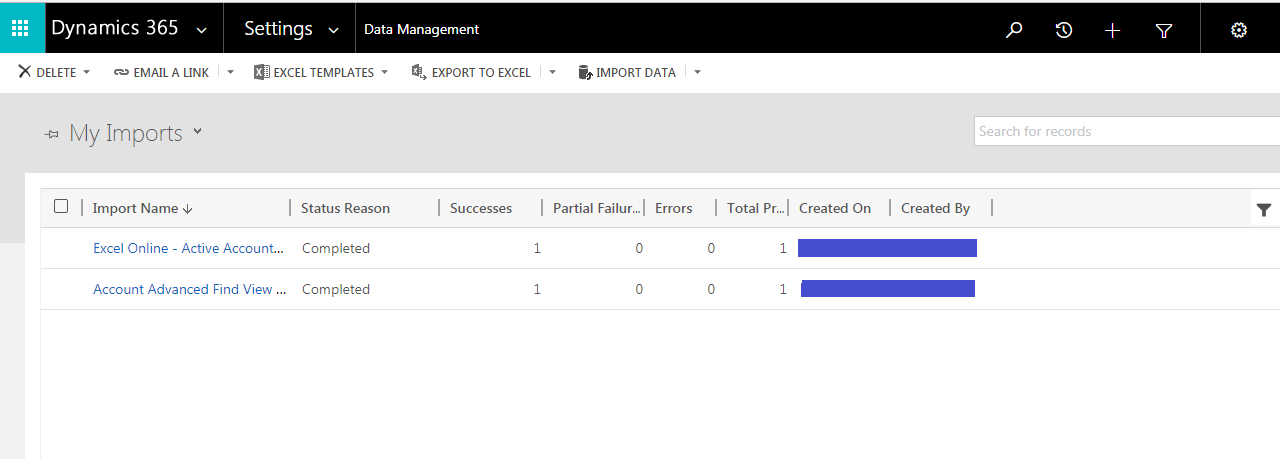
Now I am going to show you the import data view-
Here, I am concluding my topic enhance Excel in 2016 version as I have shown you in example you can create update delete records from CRM using Excel online feature. It is very easy to understand. No need to export and import data every time. Ultimately the Microsoft dynamics AX development is a direly required solution for modern businesses that are dynamic, quick and efficient. Businesses can no longer afford hiccups, slow and malfunctioning processes.


